Sean78Black
Member
- Joined
- May 29, 2016
- Messages
- 84
- Points
- 8
Today I'll show you how to upgrade to the latest version of phpMyAdmin on your computer for virtual web server XAMPP.

Step 1: Finding the current version
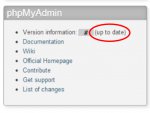
In phpMyAdmin and you search the word "Version information" to know which version you are using. If the words appear more "Latest stable version.", It means you are using lower version and needs to be updated to the latest version.

Besides, you also get the message like this:

Step 2: Find the path phpMyAdmin on your computer
If you are using XAMPP, then on the installation directory, you find XAMPP folder and from this folder, the folder phpMyAdmin you will see inside.

Step 3: Copy files Config
Inside the folder phpMyAdmin, you find config.inc.php file, then copy the file and put it in a different folder (as long as it is outside the folder phpMyAdmin). We will use this file in next steps.
Step 4: Download the latest version of phpMyAdmin to your computer.
You visit phpmyadmin.net, then download the latest version of phpMyAdmin to your computer, unzip it.
Step 5: Place the new file to phpMyAdmin folder
You go back to phpMyAdmin folder, and then delete all the files are located in this folder. Then copy all the files that we have downloaded new and unzipped in Step 4, then paste it into the phpMyAdmin folder.
Step 6: Insert the Config file
Now we find config.inc.php files that we have built in step 3, copy the file and putting into phpMyAdmin folder.

PhpMyAdmin wizard update is done, now you go back to the screen of phpMyAdmin and you will see the latest version that you have successfully updated.
Good luck!

Step 1: Finding the current version
In phpMyAdmin and you search the word "Version information" to know which version you are using. If the words appear more "Latest stable version.", It means you are using lower version and needs to be updated to the latest version.

Besides, you also get the message like this:

Step 2: Find the path phpMyAdmin on your computer
If you are using XAMPP, then on the installation directory, you find XAMPP folder and from this folder, the folder phpMyAdmin you will see inside.

Step 3: Copy files Config
Inside the folder phpMyAdmin, you find config.inc.php file, then copy the file and put it in a different folder (as long as it is outside the folder phpMyAdmin). We will use this file in next steps.
Step 4: Download the latest version of phpMyAdmin to your computer.
You visit phpmyadmin.net, then download the latest version of phpMyAdmin to your computer, unzip it.
Step 5: Place the new file to phpMyAdmin folder
You go back to phpMyAdmin folder, and then delete all the files are located in this folder. Then copy all the files that we have downloaded new and unzipped in Step 4, then paste it into the phpMyAdmin folder.
Step 6: Insert the Config file
Now we find config.inc.php files that we have built in step 3, copy the file and putting into phpMyAdmin folder.

PhpMyAdmin wizard update is done, now you go back to the screen of phpMyAdmin and you will see the latest version that you have successfully updated.
Good luck!


