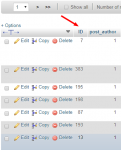
Changing the Post ID in WordPress is generally not recommended, as it can potentially lead to issues with links, functionality, and data consistency. However, if you have a specific need to change a Post ID, you might consider the following cautionary steps.
Note: Always make a backup of your WordPress site before making significant changes.
Here are the steps to change a Post ID in WordPress:
- Install a Plugin:
- To change Post IDs, you can use a plugin like "Post Type Switcher" or "Simple Post Type Switcher." Install and activate one of these plugins.
- Edit the Post:
- Go to the WordPress dashboard.
- Navigate to "Posts" and open the post you want to edit.
- Change Post Type:
- In the post editor, locate the "Publish" box.
- Next to "Status" and "Visibility," you should see "Post Type." Use the dropdown menu to switch the post type (e.g., from "Post" to "Page" or vice versa).
- Update the Post:
- After changing the post type, click the "Update" button to save the changes.
- Change Post Type Back (Optional):
- If you switched the post type, you might want to switch it back to its original type to maintain the intended functionality. Repeat steps 2-4, changing the post type back to its original setting.
- Adjust Permalinks and Links (Important):
- Changing the Post ID can impact permalinks and links throughout your site. You'll need to update any internal or external links pointing to the post manually.
- Check for Issues:
- After making changes, thoroughly check your website to ensure that there are no issues with links, functionality, or data consistency.
Keep in mind that altering the core functionality of WordPress posts, including their IDs, can have unintended consequences. It's essential to understand the implications and thoroughly test your website after making such changes. If you're not comfortable with these steps, consider seeking assistance from a developer or using alternative methods to achieve your goals without changing Post IDs.


