2Fast2BCn
New member
- Joined
- May 27, 2016
- Messages
- 10
- Points
- 0
MySQL is a relational database management system and using for free on all web systems from the open source CMS to the sites designed by small and large web companies, it was integrated to use with Apache, PHP. Today I want to share with you a quick guide to install MySQL on your Dedicated Server or VPS with the operating system installed CentOS .
Requirements:
servers running on CentOS.
basic knowledge to do via shell
about 15 minutes of time
Get Started
Step 1:
Connect to your VPS or dedicated and loged in your server.
Before you proceed, you need to know that all the commands are executed without the "sudo" prefix.
So in the system if you are using a user that is not the root, you'll have to add the "sudo" prefix to commands.
Step 2:
Install MySQL using the yum command. The command is as following:
The command will ask for confirmation (the download is approximately 22 megs). Press "Y" to confirm

when finished it will appear in shell with a message: "Complete!"

Step 3:
Perfect! MySQL is properly installed on our servers. Now it's time to start the main MySQL services.
The necessary command is as following :
As before, the system will have to show that everything went successful writing "OK" on the screen.

Step 4:
Configure the root password of MySQL.
Such as your operating system, MySQL also has its root. You also can set your own password if wanted.
To set the root password for MySQL, you must use the following command:
Following this command prompts you to enter your root password. For the first run, you enter to create a blank password

The system will ask you at this point: Set root password? [Y/n]

Press the Y key and Enter
At this point you will set your own password and must enter the password twice.

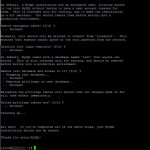
The system will proceed by asking a few questions that will be appeared and you should press "Y" to proceed to the next.

After completing this step will show the message:
Requirements:
servers running on CentOS.
basic knowledge to do via shell
about 15 minutes of time
Get Started
Step 1:
Connect to your VPS or dedicated and loged in your server.
Before you proceed, you need to know that all the commands are executed without the "sudo" prefix.
So in the system if you are using a user that is not the root, you'll have to add the "sudo" prefix to commands.
Step 2:
Install MySQL using the yum command. The command is as following:
Code:
yum install mysql-server
when finished it will appear in shell with a message: "Complete!"

Step 3:
Perfect! MySQL is properly installed on our servers. Now it's time to start the main MySQL services.
The necessary command is as following :
Code:
service mysqld start
Step 4:
Configure the root password of MySQL.
Such as your operating system, MySQL also has its root. You also can set your own password if wanted.
To set the root password for MySQL, you must use the following command:
Code:
/usr/bin/mysql_secure_installation
The system will ask you at this point: Set root password? [Y/n]

Press the Y key and Enter
At this point you will set your own password and must enter the password twice.

The system will proceed by asking a few questions that will be appeared and you should press "Y" to proceed to the next.

After completing this step will show the message:
That's all. Your MySQL configuration is successful!All done! If you've completed all of the above steps, your MySQL
installation should now be secure.
Thanks for using MySQL!


